How to Upload a Print Ready Ad (Client POV)
https://embed.app.guidde.com/playbooks/tESRtYBuZV4aJkBX9kLfXj
This guide will walk you through the process of uploading a print-ready ad in the client portal.
Go to citylifestylehq.com
1. Providing a Print-Ready Ad
Providing a print-ready ad ensures clients have full control over the design, layout, and messaging of their ad, allowing them to maintain brand consistency and meet specific advertising goals. It also speeds up the production process, reduces the potential for errors or misinterpretations, and eliminates additional design costs, ensuring the ad is printed exactly as envisioned.
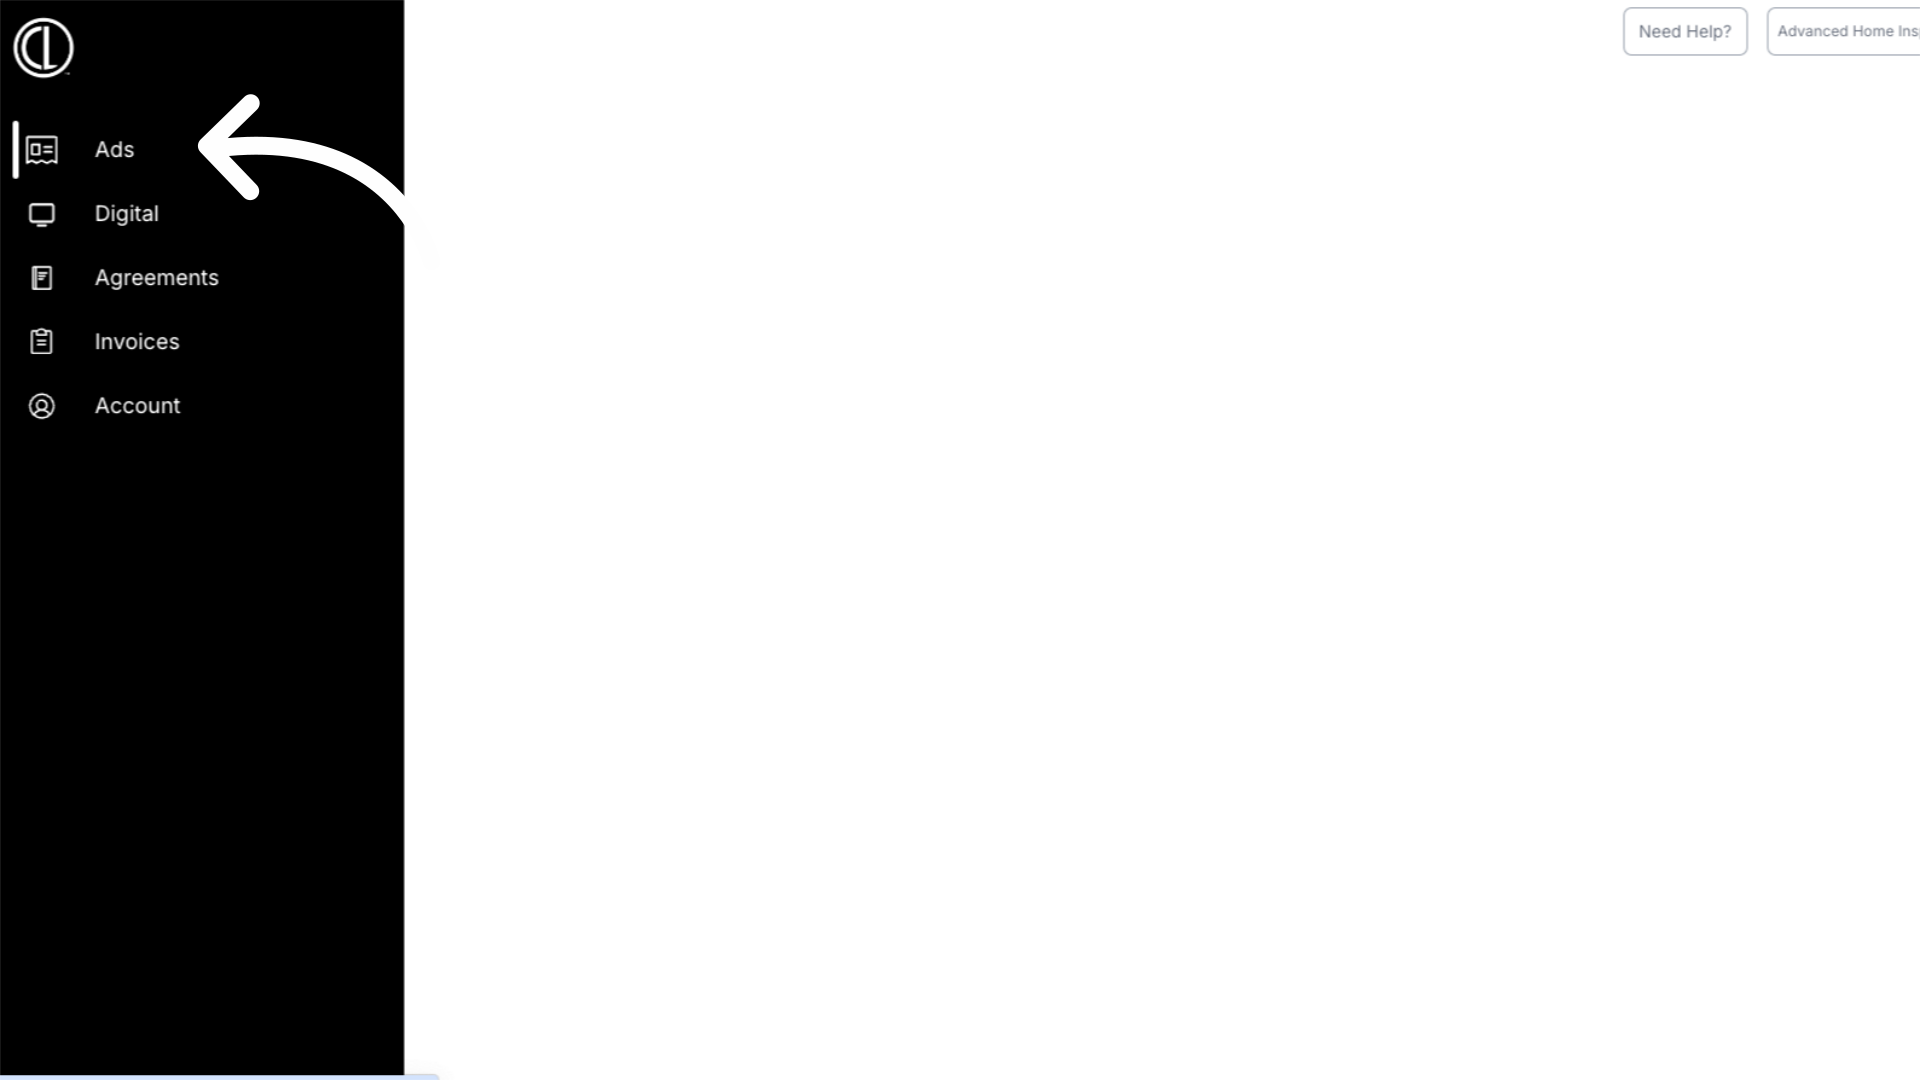
2. Click "Ads"
In the customer portal, select the Ads icon located from the menu on the left hand side of the page.
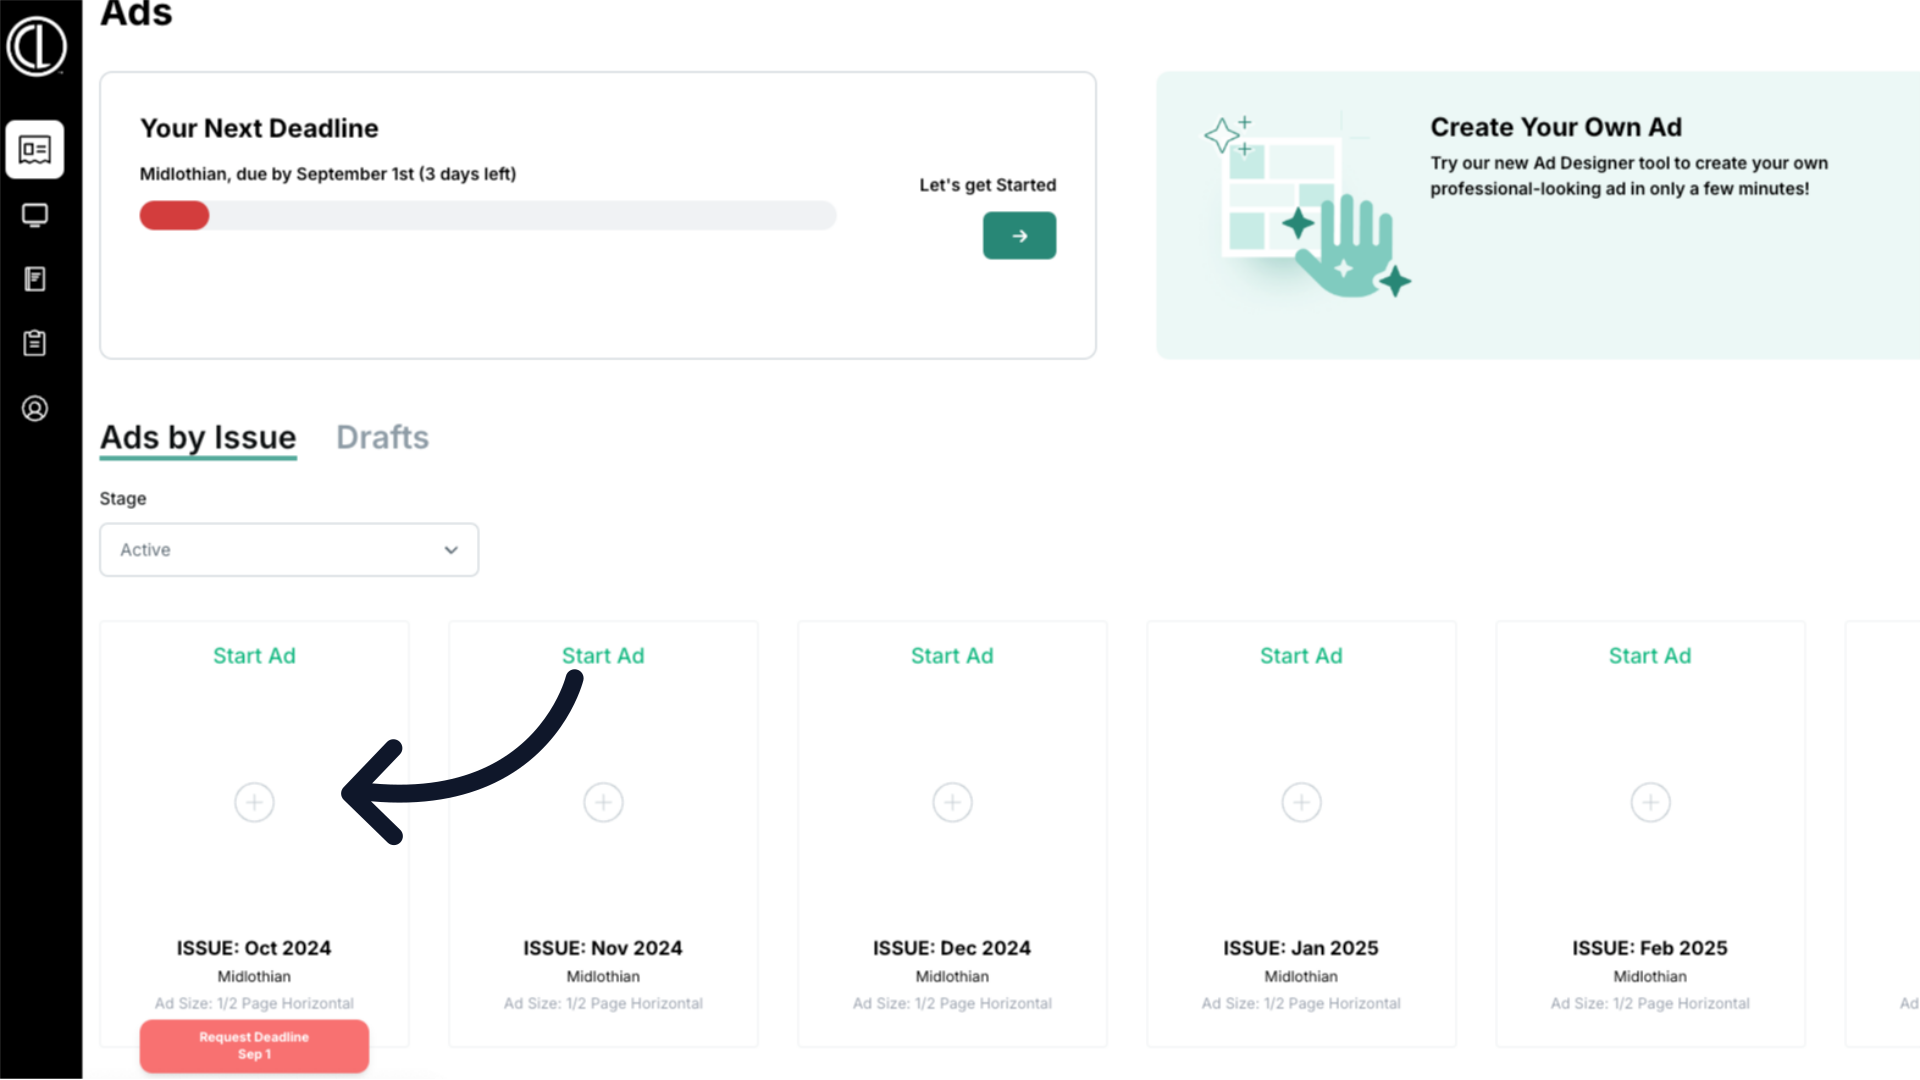
3. Click the + on the correlating issue
Locate the insertion by month you are wanting to upload for and click the gray plus sign.
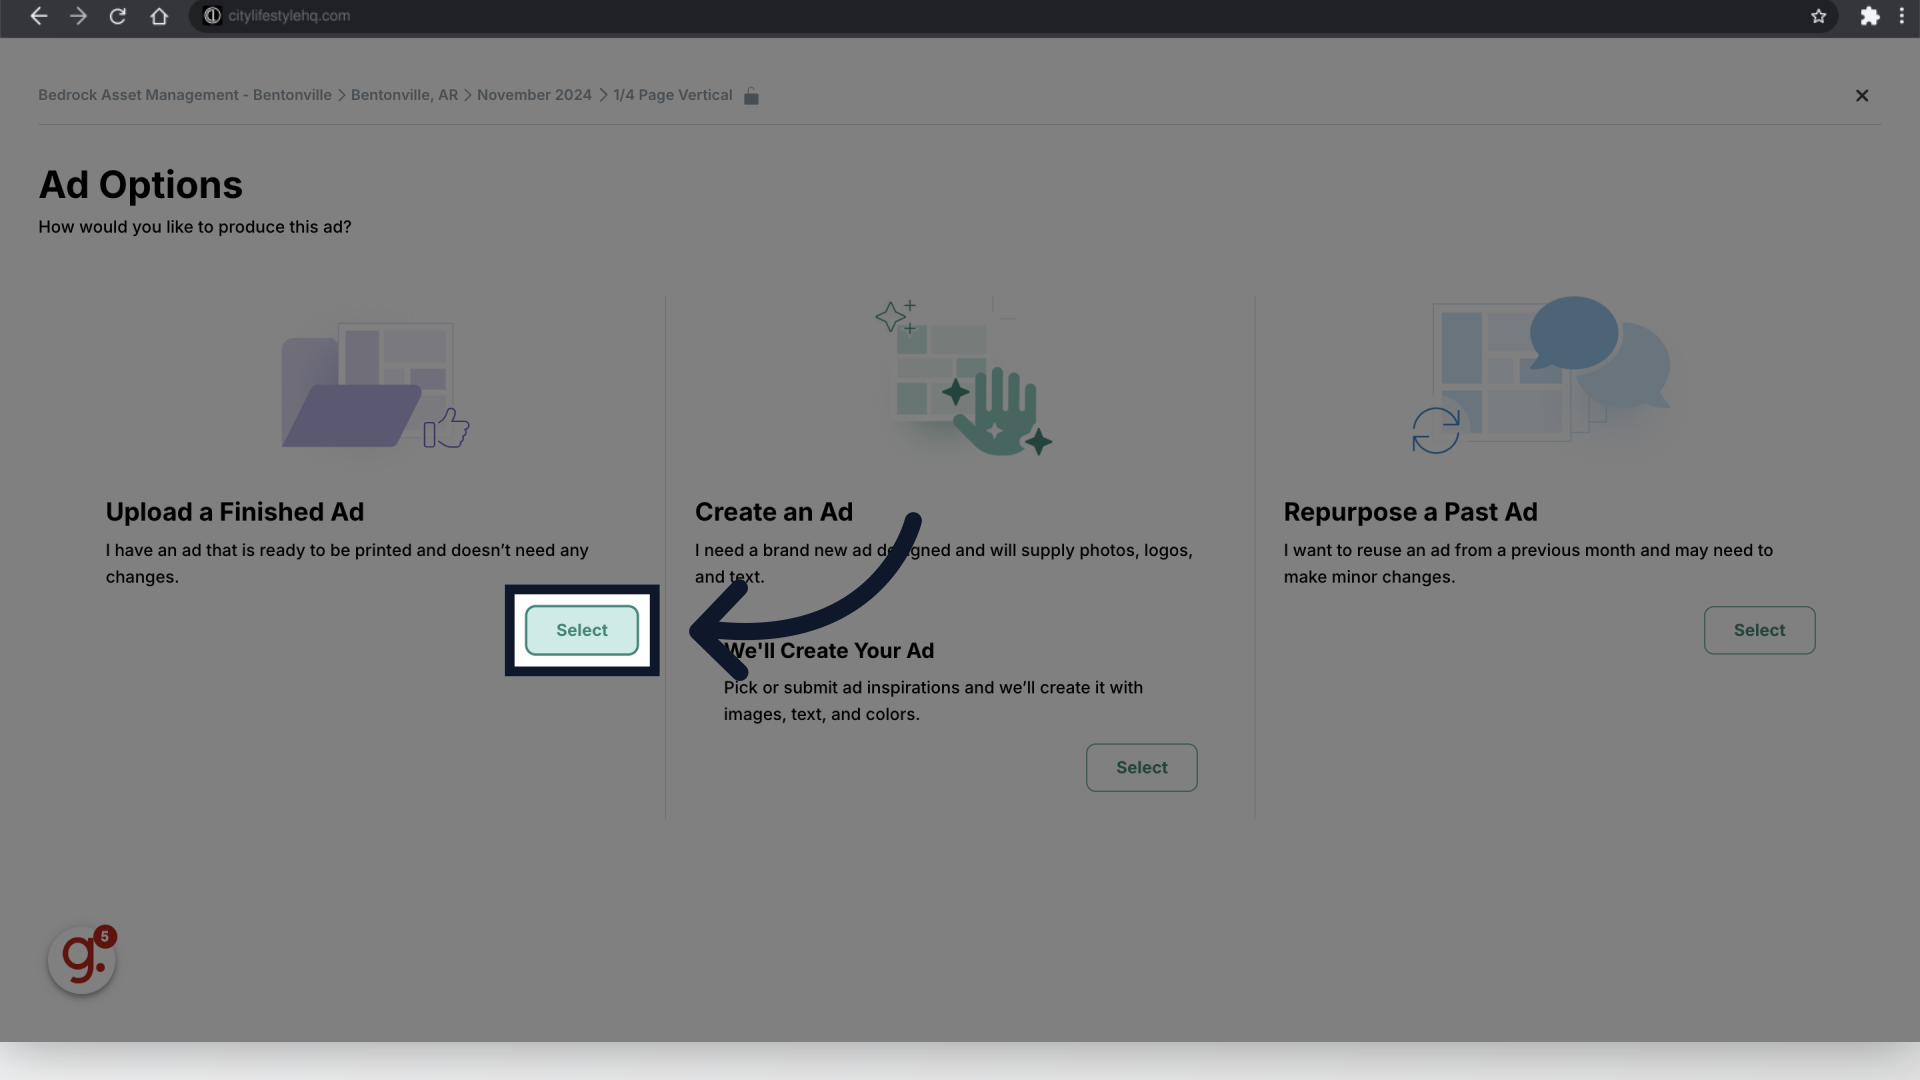
4. Upload a Finished Ad
Under Upload a Finished Ad click Select
5. Click "Upload Provided Ad"
Click the green "Upload Provided Ad" button located towards the top left side to upload your Print Ready Ad PDF file.

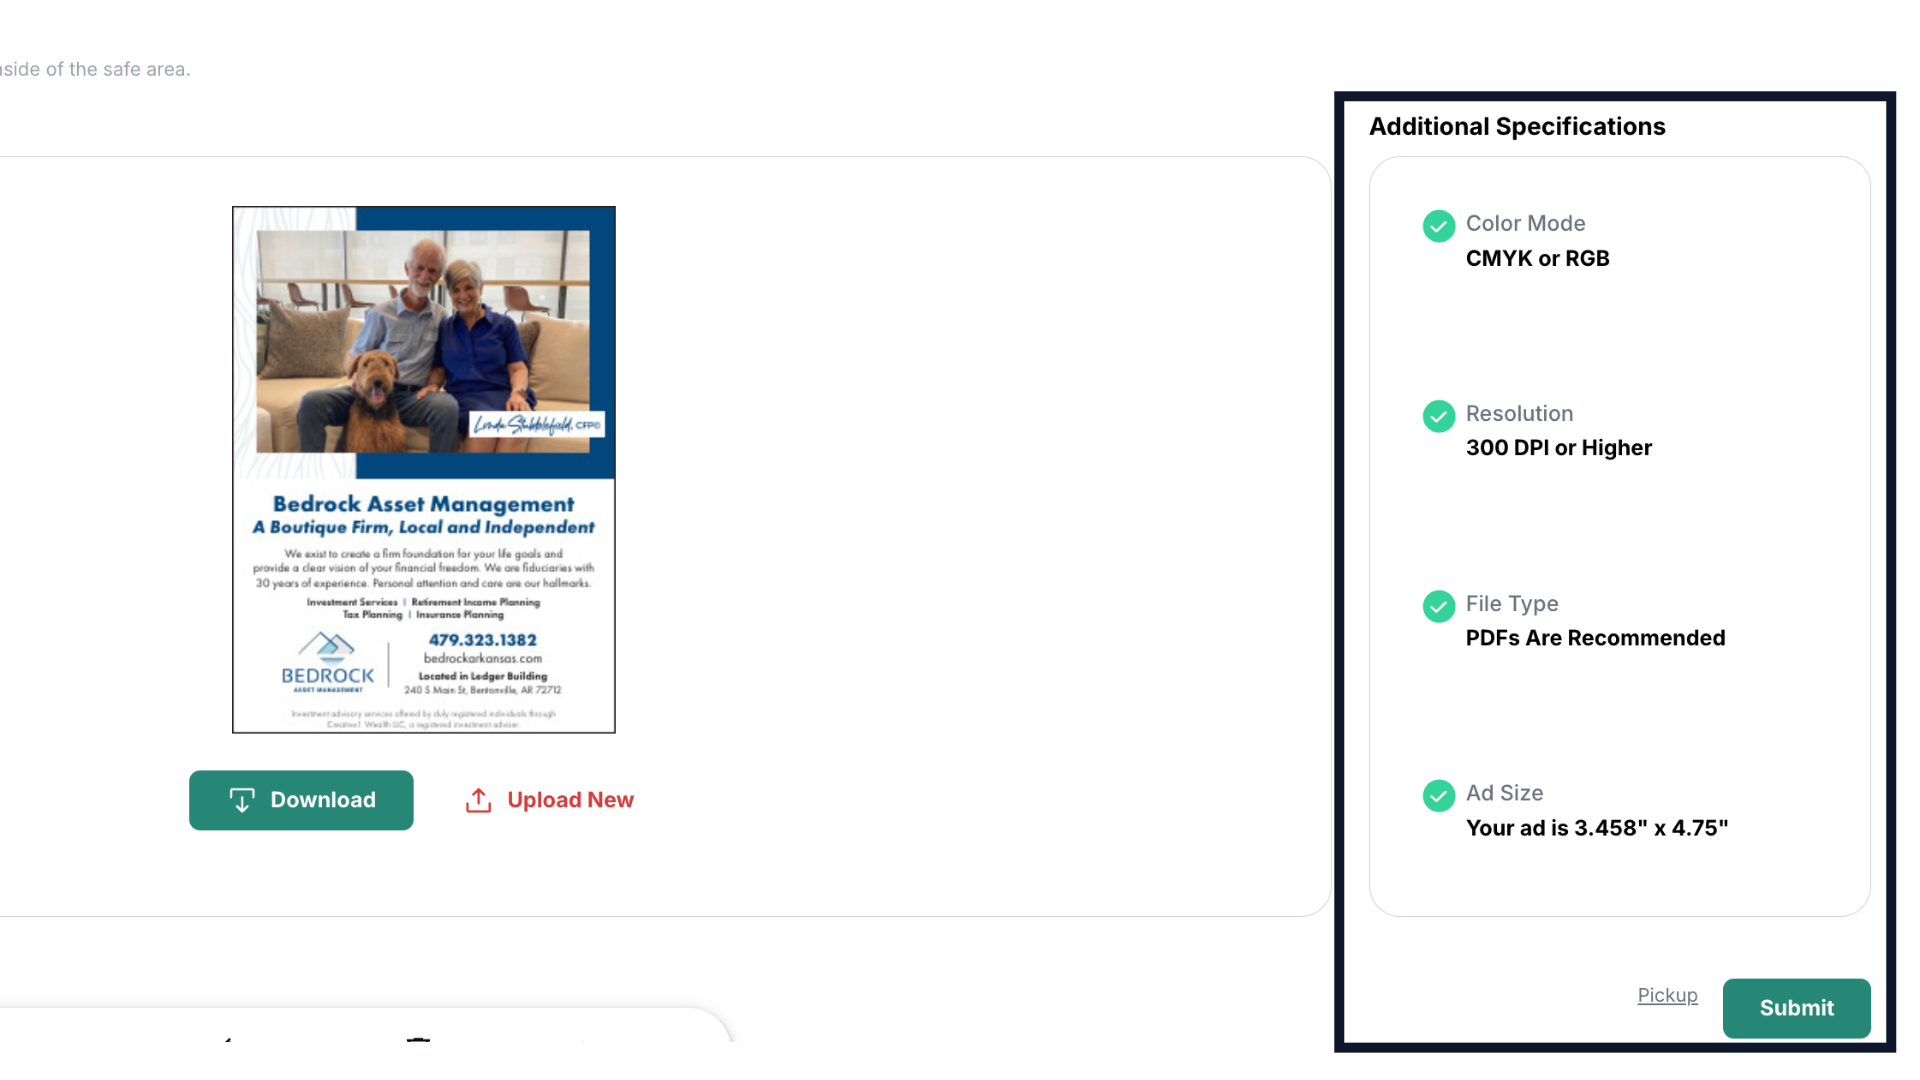
6. Review Ad and Submit
Once the ad has been uploaded, verify the Additional Specifications on the right-hand side have green check marks. Green checkmarks indicate the file meets that guideline. If there is a red X this indicates an issue with one of the guidelines and will need necessary revisions to the file before proceeding with the submission. Click Submit when all specifications are met.
 The guide covered how to upload a print ready ad in the client portal.